
Trac off light + mil + cruise control dropouts + no abs lamp
TRAC Off Light + MIL + Cruise
Control Dropouts + No ABS Lamp
By John Cribb
These are mysterious, patient but well known and related problems
with MKIV Supra’s caused by cold solder joints or broken traces on certain
printed circuit boards in the dash warning lamp clusters.Symptoms:
- The TRAC Off lamp may illuminate from time to time
accompanied by a dimly lit MIL - Cruise control may stop working
- Engine warning lamps in left hand side dash pod may or
may not work at all - Any or all of these conditions can be manifested by
giving either the left or right hand Warning Lamp cluster a sharp couple of
raps with the knuckles, or pressing on them with 2-3 fingers.
The Fix:
- Removal of engine Warning Lamp pods from dash, and a
“touch up” of all exposed solder joints, along with inspection and repair of
any broken printed circuit traces.
Tools Needed:
- For the Warning Lamp cluster removal, one normal length
#2 Philips screwdriver, and one “shorty” #2 Philips are all that are required.
Magnetic tips are your friends here. - For the soldering job, a well lit work area, a 25 watt
pencil tip soldering iron, and some rosin core (not acid core) soldering paste
or flux, are required, along with 1-2 flat wooden toothpicks. The 25 watt
pencil tip iron is just about perfect for this job as it melts the solder
joints quickly, but doesn’t overheat or burn the board. A 15 watt iron doesn’t
apply enough heat and this will cause “cold” solder joints, while a 50 watt
iron will scorch the board. The toothpicks will be used to apply the rosin
flux to the solder joints.
Warning Lamp cluster removal:
- First, disconnect the negative battery terminal to
prevent airbags from inadvertently going off and/or accidental short-circuits
from occurring. - Next, get the soldering iron plugged in and heating up.
The cluster removal won’t take more than 10-15 minutes.
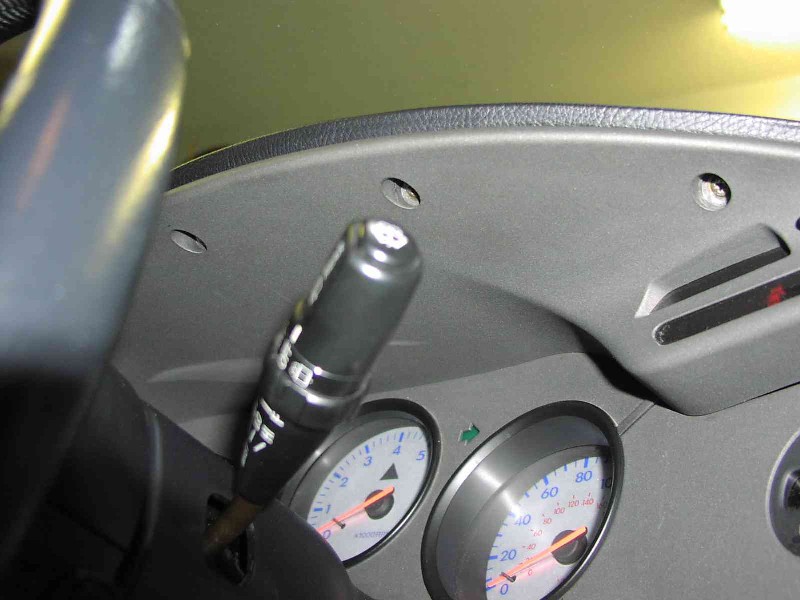
Now, looking up under the instrument cluster, notice there
are five (5) screws. Remove these:
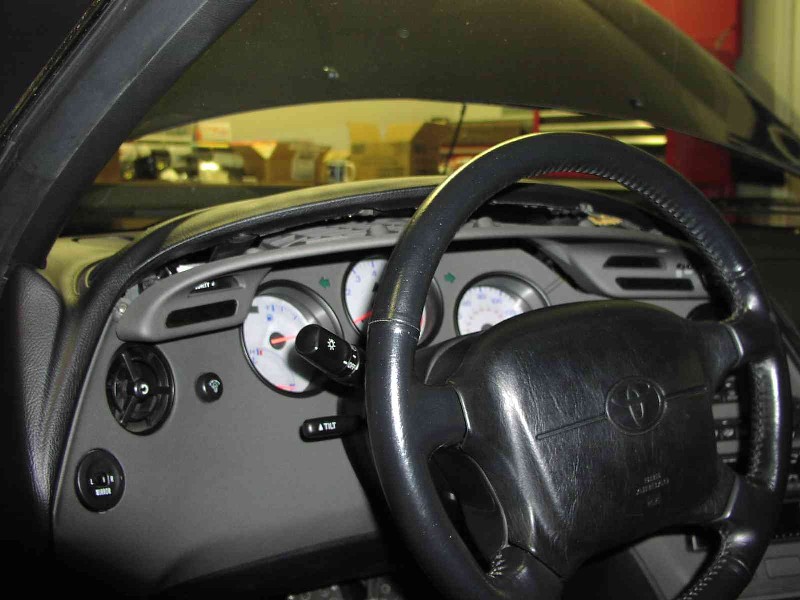
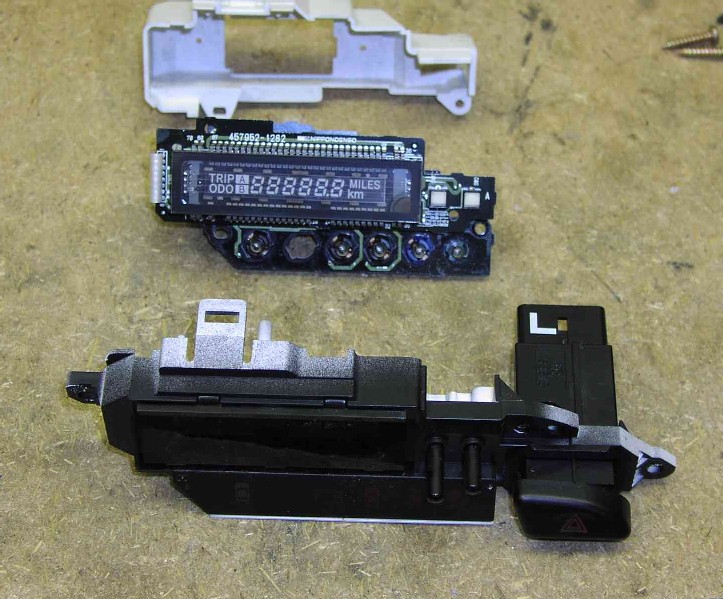
This upper trim piece with the left & right warning lamp
pods & odometer can now be pulled away from the dash:
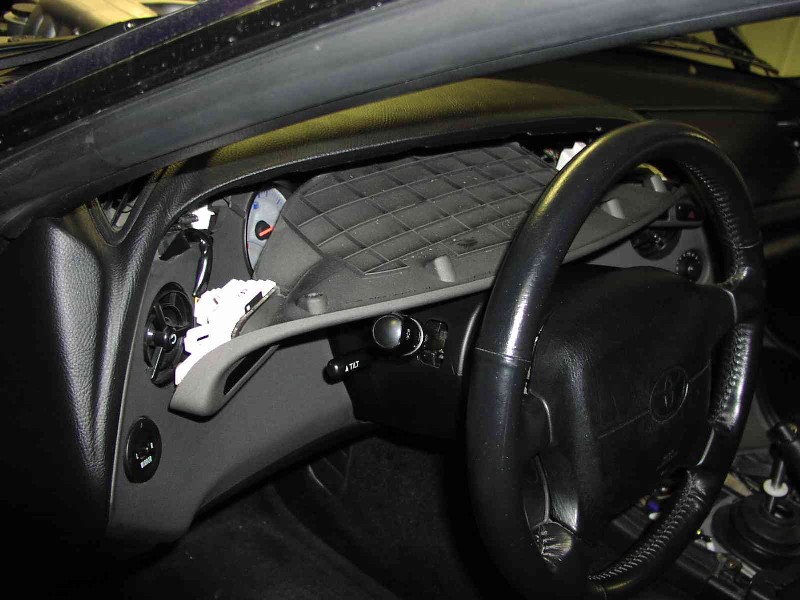
Very carefully pull this piece away from the dash until the
connectors are exposed for the right & left warning lamp pods. Find the spring
releases on these connectors and release the harness and unplug the assembly. Do
not force anything here! Once you properly release the spring catches on the
connectors, they should unplug fairly easily. Do not pull on the wires
themselves, only the plugs & sockets:
Once the trim piece with lamp pods has been removed, it’s
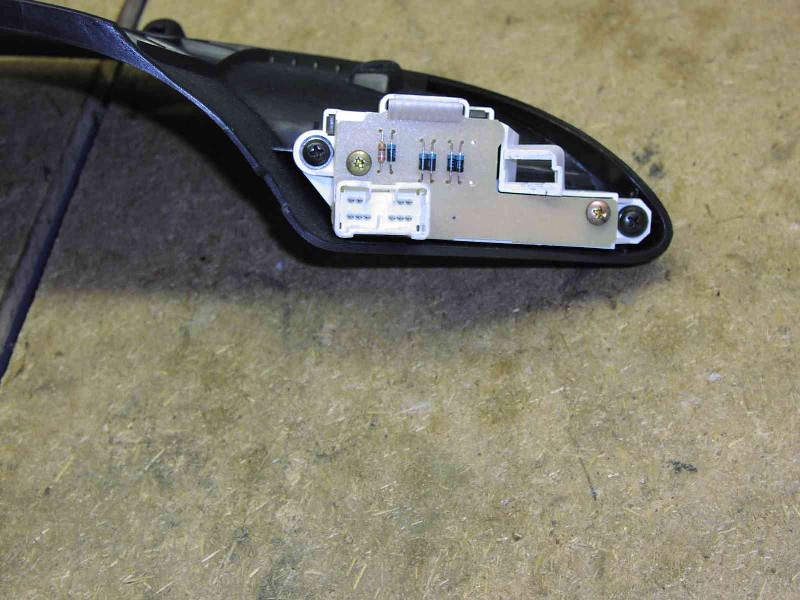
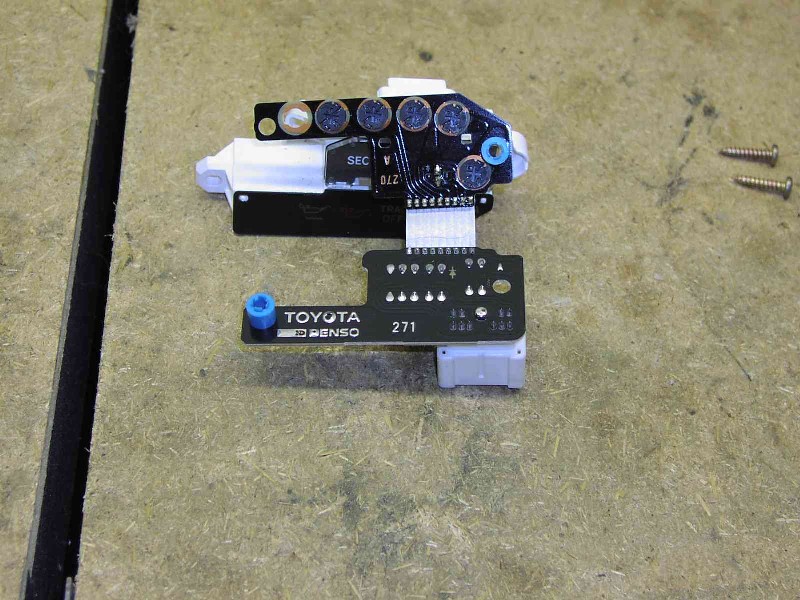
time to take the lamp pods off and disassemble. Here is a photo of the left hand
pod where most of the problems occur:
Remove the black screws first, which hold the pod to the
trim, then remove the brass screws which will expose the two printed circuit
boards. Disassemble the unit.
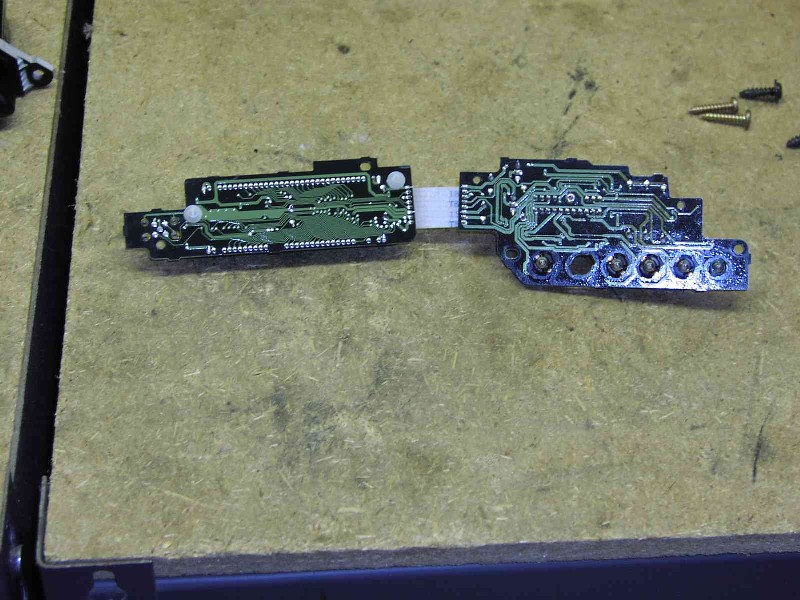
Gently spread the boards apart to expose the solder
connections. Note how the main connector for the module is mechanically fastened
to the board by its solder joints – this is one weak spot, with the connections
for the ribbon cable also being suspect:
Now, apply a thin coating of rosin core flux to all the
exposed solder joints and “touch” each one with the soldering iron so that the
solder becomes molten again and flows through the joint. Leave the iron on the
joint only long enough to ensure the solder has reflowed, then remove it. Do not
jar or move the assembly for at least 5-10 seconds after removing the iron, as
this may result in a “cold” joint. If you have done this properly you should be
rewarded with a shiny new solder joint. Note, it must be gleaming & shiny – if
it looks dull, then you moved it while it was solidifying, didn’t heat it
enough, or you forgot to use the rosin flux to keep the joint clean. The use of
rosin flux is MANDATORY for this work. The high heat of soldering causes rapid
oxidation of the metal – oxidation leads to poor bonding, and poor bonding means
cold solder joints. If your joints are not shiny, you must do them again.Repeat this process for each exposed solder joint, then
clean the excess flux off the board with a clean rag or paper towel and inspect
your work closely. Make sure all new solder joints are clean and shiny, and
ensure that no joints have accidentally shorted together by “bridging”.
If you have access to a good light source and a magnifying
glass, it may be useful to inspect the board traces closely for any evidence of
cracking or breakage as some owners have reported problems with broken traces on
their boards rather than just cold solder joints. If any broken traces are
noted, the break can usually be bridged by applying a “very” small bit of solder
at the point of the break. Keep in mind that less is best! Only apply a small
bit of solder to the tip of the iron – not even enough to make a visible “drip”
on the tip, then apply the tip to the broken trace and let the solder “heal” the
break.
Once you are happy with this cluster, repeat the process
for the right hand odometer cluster. Note how many more connections it has due
to the display:
Finally, reassemble both Warning Lamp clusters in their
pods and into the trim piece, reconnect the wiring harness and reinstall the
trim piece into the dash. Note this trim piece has several pin & sleeve type
locators on both the left & right sides, as well as the top of the gauge
cluster. Make sure these pin & sleeve points are mated correctly as the piece
will not fit otherwise and/or something will break. Replace the five (5) black
trim screws, reconnect the negative battery terminal and you’re ready to test
your work.Start the car, noting that the ABS lamp will stay on in the
left-hand pod for two seconds after the ignition is turned on (this is the ABS
self test). After this, confirm that all warning lamps have extinguished and the
car is running OK. Give both left & right pods a couple of sharp raps with your
knuckles, or apply finger pressure and see if a MIL can be produced. If this
procedure produced a MIL previously, and does not now, congratulations! Take the
car for a spin, over some railroad tracks if possible, or other rough surface
and continue to give the left & right pods some sharp raps and watching for
MIL’s or other warning lamps.If any new Warning Lamps or MIL’s are illuminated, you may
have to disassemble the dash, pull out the instrument cluster, and resolder the
joints on this assembly just as you did for the Warning Lamp pods.

![]()
hey mate to to rest s1 odometer ?