
A'PEXi AVC-R Installation
*Do this at your own risk. we dont guarantee anything. Make sure you know exactly what you are doing, and that you are knowledgable with simple electrical wiring and splicing.
Purpose:
To control the boost more accurately and reliably. Better
turbo response and ability to monitor thing you really know noting about.
Tools required:
10 mm socket
Phillips screw driver
Needle nose pliers
Wire splices and splicing pliers
Electrical tape
Coat hanger
Step One:
**UNPLUG THE NEGATIVE BATTERY TERMINAL**
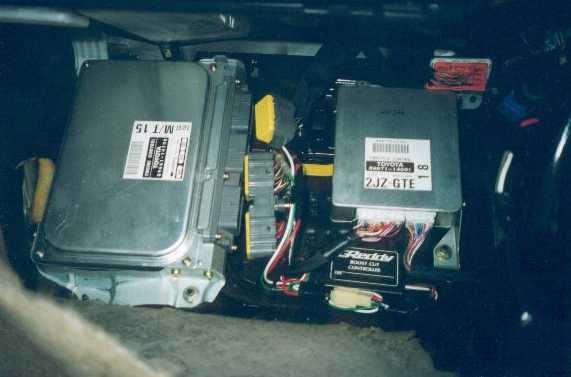
Start by lifting the carpet in the passenger side and removing the black plastic cover by removing the two 10mm nuts from the bottom of the cover, to gain access to the ECU.
Then loosen the 10mm bolt from the middle of the ECU connection and unplug the ECU.
Step two:
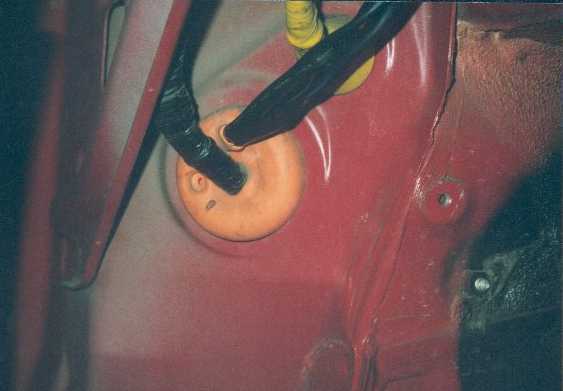
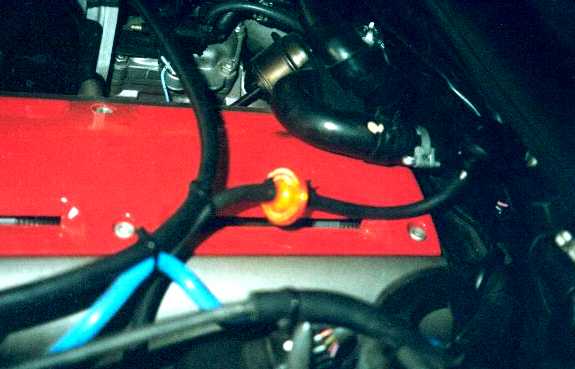
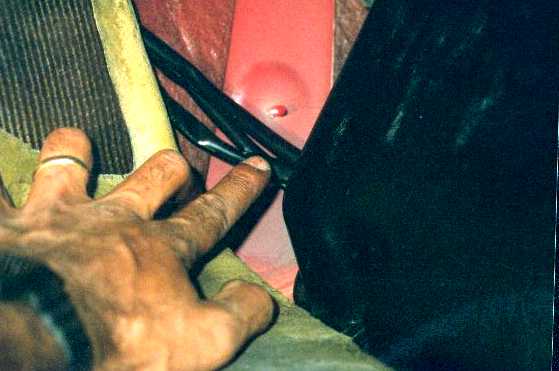
Put the car up on and remove the right front tire and the plastic fender. As shown in the picture, run the wires through the orange grommet to the engine compartment, using a coat hanger to fish it through the grommet. (Cut the two connectors from the stack of wires to make it easier to route the wires through the grommet and later solder and heat shrink them back together).
Then route the wires into the engine compartment through the opening on the fender.
Step Three:
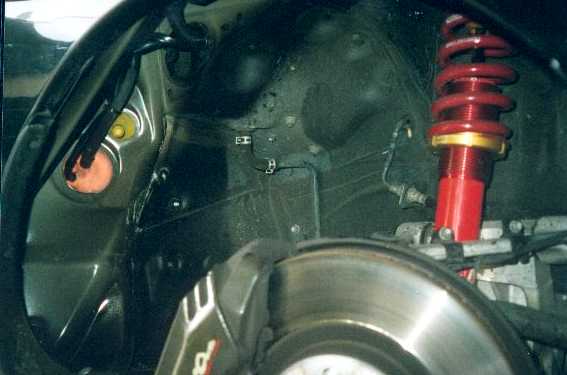
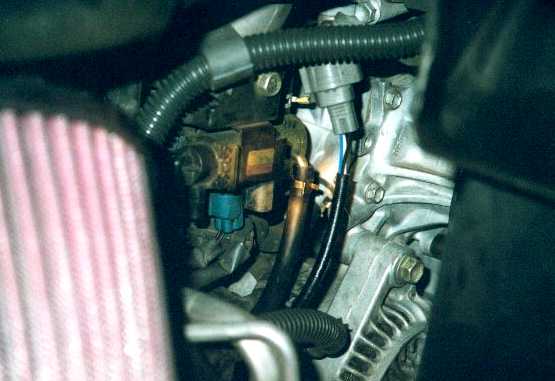
Route the wires into the engine compartment from right behind the evaporator canister by the firewall on the right hand side of the car.
Step Four:
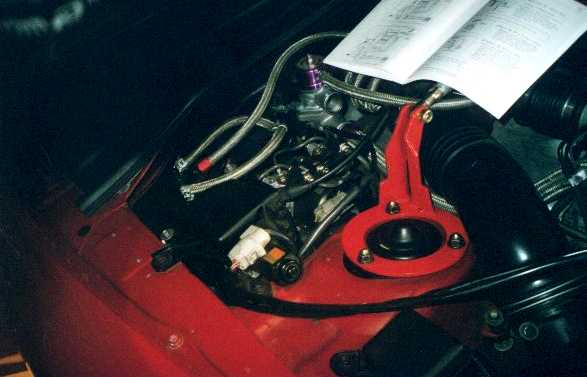
Mount the supplied pressure sensor on the firewall with the nipple facing down and run a "T" (supplied) to the sensor and attach the supplied air filter and tie wrap the hoses to the air filter tightly. You can also connect the pressure sensor to its harness, which you've just pulled through the firewall.
Step Five:
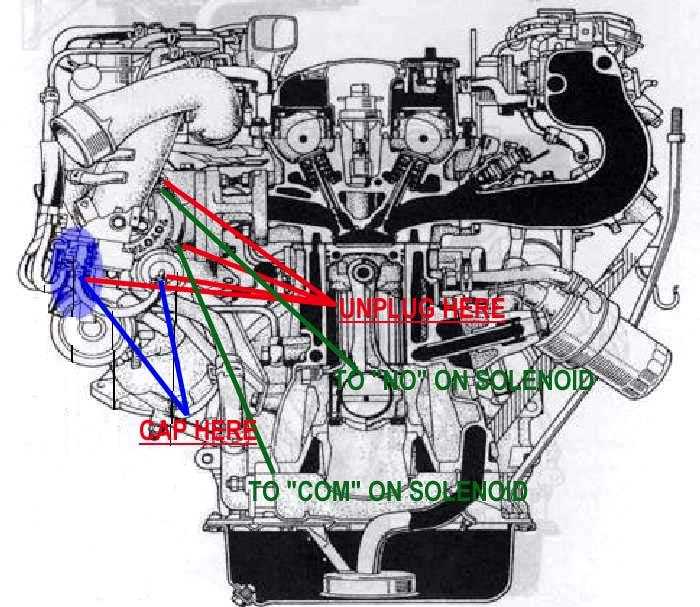
(see this diagram first, click on it)
Disconnect the VSV and the vacuum lines from the VSV to the wastegate actuator. Cap both VSV and the bottom of the Wastgate actuator (total of 2 caps. Tie wrap the caps securely). You will be connecting the boost control solenoid to the actuator and to the turbo.
"NO" port goes
to --> Turbo
"COM" port goes to --> Actuator top
Step Six:
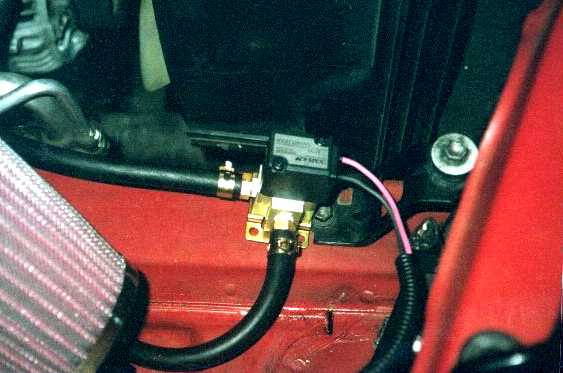
Connect the vacuum line from the waste-gate to the "COM" side of the solenoid, and Connect the vacuum line from the turbo to the "ON" side of the solenoid. Try to locate the solenoid as close to the waste-gate actuator as possible and use the least amount of vacuum hose as possible. Once, you located a spot for the solenoid, securely attach is using the supplied 4 screws and the rubber base to dampen the vibration.
Step Seven:
ECU connections - Connect the AVC-R wires to the location on the ECU shown in the diagram.
The following diagram should work for all models 1993-1998, if you need a thorough explanation of these connections, please refer to the Terminals of ECM.

*Make sure to splice both ground wires from the AVC-R (GRN & BLK) at different location on the ecu ground wire.
These connections should give you correct readings for all the monitors: RPM, Speed, Throttle, and Boost, which of course assuming that you've connected the wires correctly, and that your AVC-R is set to "Cyl - 6, Spd - 4, Thr - UP".
**Important NOTE**
By connecting the RPM wire to #58 on the ECM, you will get a correct RPM readout, but you may experience problems with your injector duty readings. Just note that the injector duty reading is irreverent in boost control, as opposed to the importance of proper RPM readings to control boost. That is another reason why some people who connect their RPM wire to somewhere else other than #58, experience extreme boost-overshoot problems...getting a correct RPM readout will help correct such problems. :)
Step Eight:
Once you are done connecting the ECU, replace the ECU cover and run the wires going to the head-unit toward the bottom of the black plastic ECU cover where there is an opening and replace the two 10mm bolts.
Step Nine:

Once you are done connecting the ECU, replace the ECU cover and run the wires going to the head-unit toward the bottom of the black plastic ECU cover where there is an opening and replace the two 10mm bolts.
Step Ten: Initializing/Tuning
I have found out through personal experience, that tuning the AVC-R is not hard at all if you don't "make" it hard. Tuning the AVC-R can be as simple as a push of a few buttons, to making you want to pull your hair out and go haywire once you start playing around with settings other than your Boost/Duty. Start off by keeping it simple, and learn to get the hang of it first before you start to play with anything else.
1. First start off by reseting the unit. Many have often complained that their AVC-R does not save their new settings. This is perfectly normal in some cases, and it is NOT a result of mis-wiring. Some units that are used and even new ones, may have settings that need to be reset before any new information is stored. That is why it is highly recommended that you reset your unit after it's first initial installation, regardless if it is brand new, or used. Go under "Settings/Initialize" and press NEXT >. Confirm "YES" when prompted "Init. All?" Now turn the ignition OFFand then back ON, and the unit should now be reset and ready to store new data.
2. Now adjust your car's settings. Under "Settings/Car Select", set the Cyl to 6, Spd to 4, and Thr to UP. This will allow the monitors to get proper readings.
3. Now pick a setting, A or B (Pretty much works like presets on a radio).
-For 1.2kg/cm², I had my Duty Cycle set at 72%. Not all cars are the same, the Duty Cycle may vary depending on the different mods you have on your car. Let's say that you also wanted to run 1.2kg/cm², start off with 70% as your Duty Cycle. Now run the car hard, and try to hit max boost. If the displayed boost level is below 1.2kg/cm², then RAISE the Duty Cycle (Use 1% increments). If the displayed boost level is above 1.2kg/cm² then lower the Duty Cycle. Do this 'til you get it just right...and hit 1.2kg/cm². When the AVC-R detects that a stable Duty Cycle has been obtained, you should see a *** appear in the Duty Cycle, which means the AVC-R has now learned your car's boost pattern, and is in "Self-Learning" mode.
Apply the same technique for all other boost settings. If you want to run lower boost, the Duty Cycle will have to be lower, and high boost it'll have to be higher, vice versa. FYI, for 0.85kg/cm², I'm using 45%. Again, Duty Cycle varies on different cars, but always try a lower Duty Cycle, and work your way up.
Just remember this:
Displayed Boost > Desired Boost: LOWER Duty Cycle
Displayed Boost < Desired Boost: RAISE Duty Cycle
And you're done! Just play the Boost/Duty cycle, and you'll get the hang of it. As you learn the unit's functions and capabilities, you will eventually master it...but start off simple. Wasn't so hard, was it?
Questions? Comments? -> E-Mail Me
![]()